


 |
| Finished shoes |
For this project I order Angelus Leather Paint bottle of 4 oz. in 186 Hot Pink, 1 oz. in 198 Buttercup and 4 oz. in 5 - White.
For a small pair of flats like these you will only need one 1 oz. bottle of what every colour you want your shoes to be and 1 oz. of white if your shoe is not already white.
I got the larger 4oz size of these paints for another project I'm doing as well latter.
I ordered the Angelus Leather paints and matte acrylic finisher from Dharma Trading.
What you will Need:
cotton pads or cotton balls
Nail polish remover with acetone (you can also use angelus leather preparer and deglazer as well)
Foam wedges or a fabric rag
Large square tip paint brush (dollar store for cheap)
Masking tape.
Angelus leather paints
Angelus Acrylic finisher (in whatever finish you want)
 |
| Bamboo Crush-25 Round Toe Mary Jane Ballet Flat in brown |
Step 2: Prep your Shoes.
 |
| Top shoe normal, Bottom shoe striped of finish (look matte/greyer) |
Simply use your cotton pads or cotton ball soaked in your remover and buff the cotton pad/ball into the surface to remove the gloss finish on your shoes or boot.
This will also remove/lift any silicone glue residue from the shoes as well from gluing the sole in manufacturing. I had 2 silicone glue patch on these shoes that was invisible to the eye and had to pick it off in the end.
If you have a shoe with a "patten leather" finish that is synthetic you want to use 600 to 1000 grit sandpaper instead to remove the finish as it's also most plastic material.
Step 3: Cover Your Shoe Sole

I recommend masking tape to mask out soles edge.
In my case the texture of the shoes are rubberised and pitted/bumpy making the masking tape not adhere at all. So I ended up using hockey tape instead.
Step 4: Paint your Base colour (If your shoes are already white you can skip this part.)
 |
| 3 thin coat |
All you need is a larger rectangle tip brush and the paint straight from the bottle. Quickly yet thinly brush your first coat. It will look streaky and sheer but that's normal.
Let each layer to dry completely and start to build up the layers one at a time.
(The paint is almost like water as well and if you just add a little bit more water you can use it in your airbrush if you prefer.)
 |
| 4 thin coats |
Step 5: Paint your Main colour
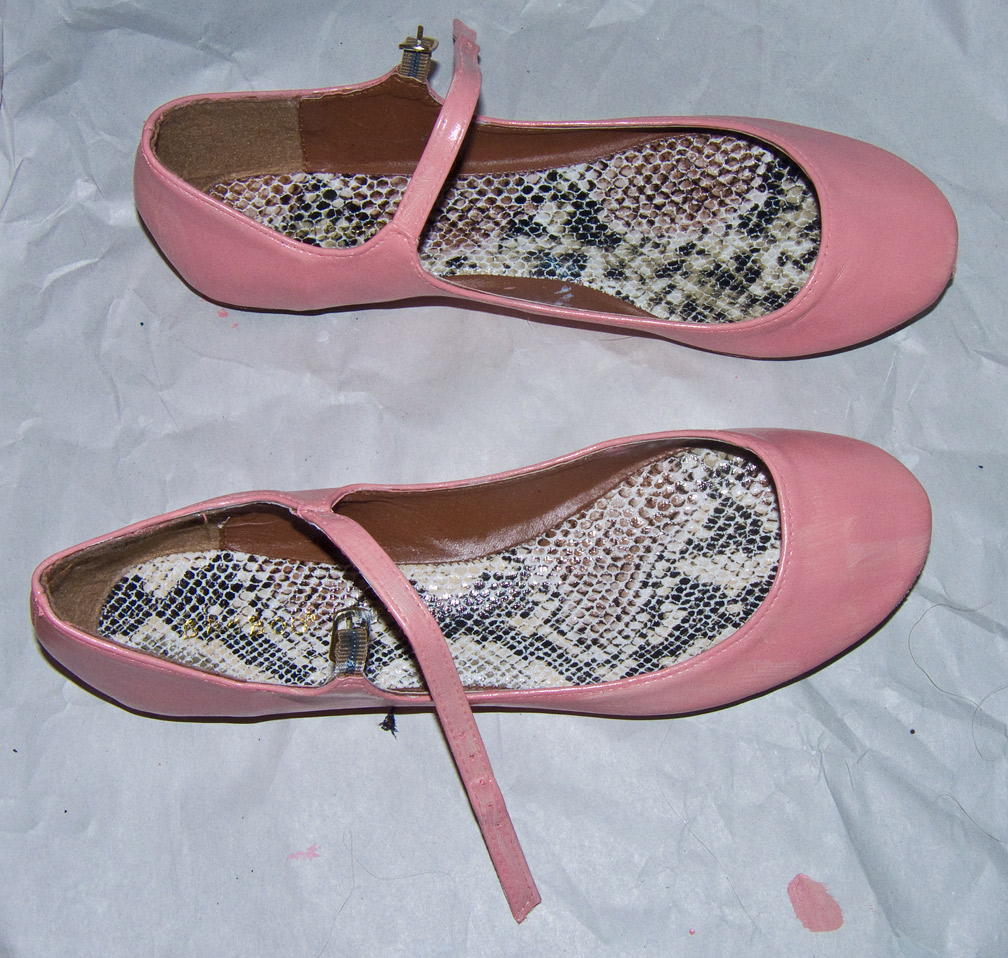 |
| 2 thin layers of Coral paint |
Again use the same brush you used for the white base colour (clean off of the white first of course) and start to paint the layers again thinly allow each layer to dry before adding the next
 |
| 5 thin layers |
Then you can paint any designs you want on your shoes of boot and repeat the same painting times.
Step 6: Add Finisher to seal your Paint.
 |
| With finisher on and dried |
The Finish not only seals the paint but also preventing that sticking finish to the paint and also adds a desired finish.
I chooses the matte version for it's low lustier finish. You only need to apply one sheer coat to the surface with a sponge or rag to finish the shoe. The finisher has a blue white colour to it when wet that if you see if it's too thick in an. You will need to sheer that thick area out if that happens.
Step 7: Clean up your Soles

If you have any spills on the edged of your soles you can use 100% acetone to clean them off. In my case the texture of the sole didn't help you I ended up with a lot of bleed trough the tape.
And your finished! Enjoy you new custom coloured shoes/boots.
Just a note you can use Angelus Acrylic finisher for other project to seal you paint work as well so it can be useful for other pieces.
FTC: This post contains an affiliate link.
wanna really nice tutorial Ani, will help many cosplayers who are looking for easy ideas for their cosplay shoes and boots. just twitter this post in my twitter , lov it~
ReplyDeleteThanks for letting me know ;)
ReplyDeletelove your flats :)
ReplyDeleteThis is cool! I didn't know you can do this! Is the shoe still flexible and does not crack ?
ReplyDeleteIt flexible which is why I love this particular paint. The paint is also designed to be thin so that if their are any fold cracks with wear and tear they are small/thin compare to other paints.
Delete