


 |
| Watari Yutaka from 闇の末裔 Yami no Matsuei (Descendants of Darkness). You can see more photo's in the link. |
This tutorial will cover how to add a part to a non skin top or button skin top wig.
What you will need for the wig!
Hair clips long
Wig (using a Le Tiger in Light Blonde from Arda)
Wefts or Ponytail for extra hair (I use a ponytail back then as wefts were not an option)
Hair Sheers
A pair of scissors with small blades (something you can cut small area with)
Hair Razor/ Feathering Razor
Hair spray (Got2B Glued brand for hold)
Allen's Tacky Glue (to seal hair into shape)
Felt same colour or close to as the wig fiber & wire (felt board it better if you can find it!)
OPTIONAL (this character has wavy hair ;) )
Curlers (foam or plastic)
A kettle or pot (to boil water)
 |
| Le Tiger in Light Blonde showing bang area. |
This is what the base wig looked like. Simple straight and one length.
Step 1:
Section out the hair in this case I wanted a centre part and use a pick come to help me part the wig.
 |
| Wig hair parted down the centre on top and tied off. |
Step 2:
Draw on the inside of the wig where you want to cut the part. With a small pair of scissors slowly cut the lace first on the inside. Then cut the rows of wefts from the inside as well gently from the sewn base so that you don't cut to much of the hair. For this wig I started the cut butt up to the button skin top but no into it. The radial button skin top hair is need to mask the start of the part centre part.
 |
| Draw with chalk or marker the centre line you want to cut |
This is what you part should look like, I cut slightly into the front wig band when I was ready to add the part.
 |
| Leave the front wig band intact. |
Step 3:
Creating the parted hair. For this I simple sew 8 layer of weft together to the length of the centre part I had cut. Then insert the bundle of hair through the centre part slit and sew both the bundle the the mesh of the wigs together.
 |
| Excuse the crud photoshop work. I didn't have a photo of this part. ;) |
Once secure you flip the wig up right again and part the new centre part with 4 layers per side of the wig.
 |
| Finished new part |
 |
| Finished new part |
Step 4:
Remove wefts from hairline. This part wasn't smooth enough to salvage as the hair was ratted to add volume from below the bang section of the wig. I use a seam ripper to cut the thread the wefts where sewn with into the base band. The band is about 3/4" wide. You can do this step before inserting the centre part a the crown.
 |
| Wefts removed and new center part exposed |
You then sew in you smooth weft both on the 3/4 top side of the ban and 2 to 3 wefts under the band to create a smooth hairline.
 |
| Smooth wefts sewn in. |
Step 5:
Style your wig. In my case I need waves for Watari.
First I braided the wig, then poured boil water over the braid and let them dry in shape. I found that the new bang area wasn't as wavy as I wanted so I went back in with 2 larger curlers for each side and rested that hair with boiled water again.
 |
| Braid hair. |
 |
| after dry |
 |
| after dry |
 |
| Curl bang area. |
Step 7:
Creating lifted bang!
I unfortunately lost my photo of this part so I'll have to draw diagrams. ;)
First you want to make your felt structure, I wanted a small lifted bang for him rather then a larger one. For the felt structure was only 3/4" tall and long enough for the hair line.
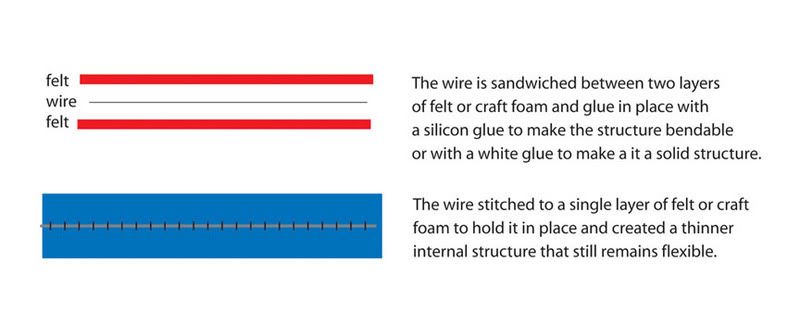
 |
| Wire loop over felt inside then sandwiched. |
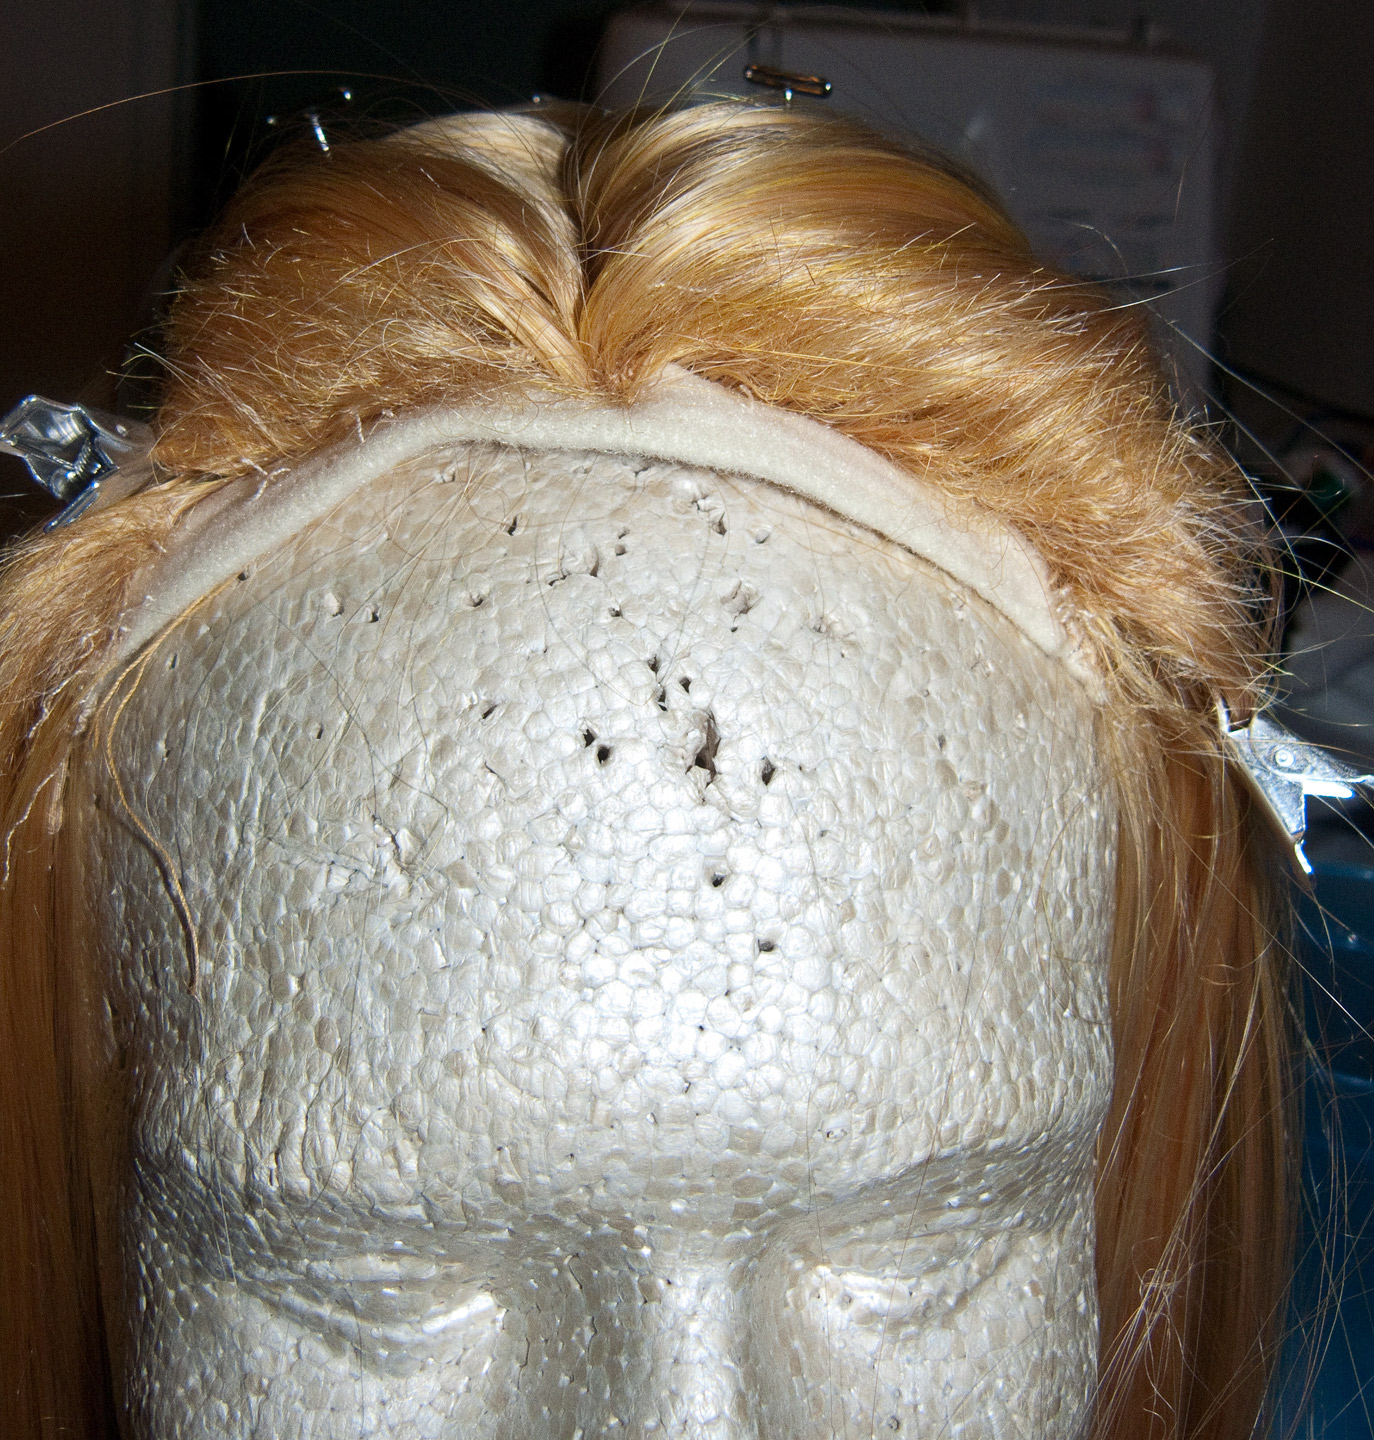
This felt piece (blue in diagram) you insert wire down through you wig mesh between the new weft bang layer and the original ones int he wig.
 |
| Top view of wig. |
Those wire you spiked through, you then turn them into loops and sew then into the mesh underside of the wig or secure them wig glue and cover them in a strip of fabric.
 |
| Wire loops coiled around the centre spike |
Once your base structure is secured you layer one layer of hair a little a time over the felt base and glue it done with Allen's Tacky Glue on both wigs of the felt. Each layer you need to let dry comply before adding the next one.
Once the layered bang is finished start to layer the top layers of hair over the front bangs to help blend them in. A little spray help to hold those layers in place.
You wig is finished!
 |
| Before wear it. |
 |
| Watari Yutaka from 闇の末裔 Yami no Matsuei (Descendants of Darkness) |
No comments:
Post a Comment